MaTouch ESP32 S3 2.1 Rotary TFT with Touch
Introduction
This wiki shows the basic usage of MaTouch ESP32-S3 Rotary TFT Display with Touch 2.1" ST7701. As an example, we’ll drive the LCD shows something using the RGB565 with 3-wire SPI interface, and show you how to install the library and try sample code to write text or image on the LCD, detect the button and rotary decoder. The ESP32-S3 we’ll be programmed using Arduino IDE. Meanwhile, it supports Square Line IDE too, it can run the LVGL.
Features
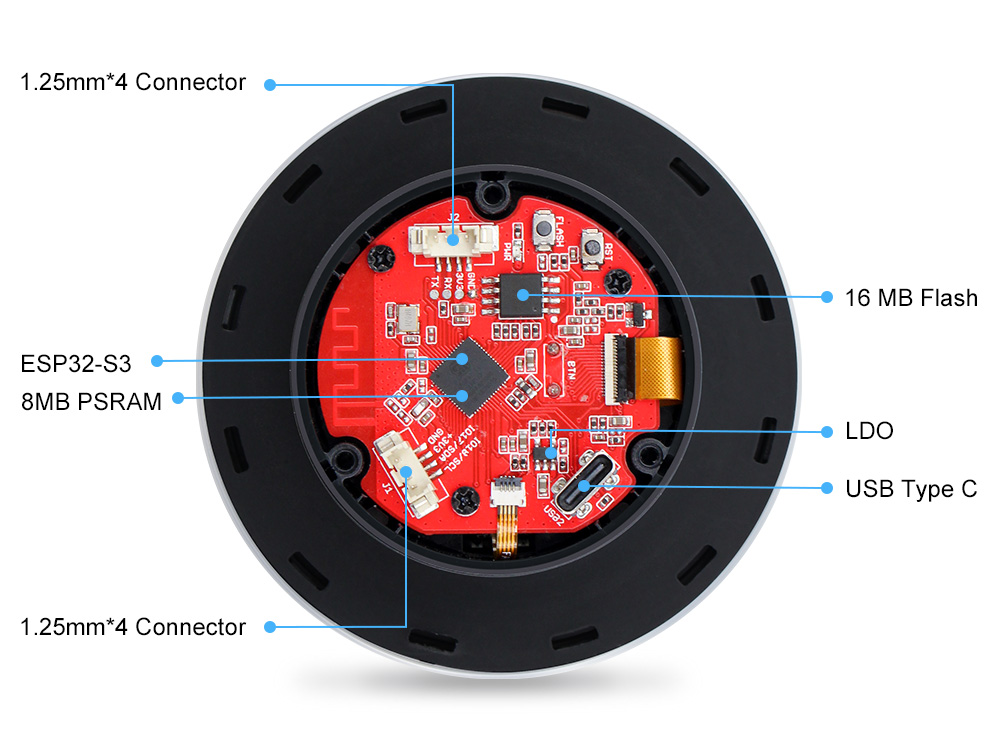
Controller: ESP32-S3, PCB Antenna
Wireless: WiFi& Bluetooth 5.0
Flash: 16MB Flash
RAM: 8MB PSRAM
LCD: 2.1 inch TFT LCD
Resolution: 480 * 480
Color: 65K
LCD interface: RGB565 + 3-wire SPI
LCD Driver:ST7701S
Touch Panel: Capacitive
Touch Panel Driver: CST826
USB: native USB Type-C
USB to UART Chip: No
Rotary Encoder and Press button: Yes
Button: Flash button and reset button
More interface: I2C; UART(1.25mm4P Connector)
Backlight Controller: Yes
MicroSD: No
Audio: No
Arduino Support: Yes
LVGL/SquareLine Compatible: Yes
Type-C Power Delivery: Not Supported
Power Supply: USB Type-C 5.0V(4.0V~5.25V)
Operation temperature: -40℃ to +85℃
Dimension: 71.27mm71.27mm
Hardware

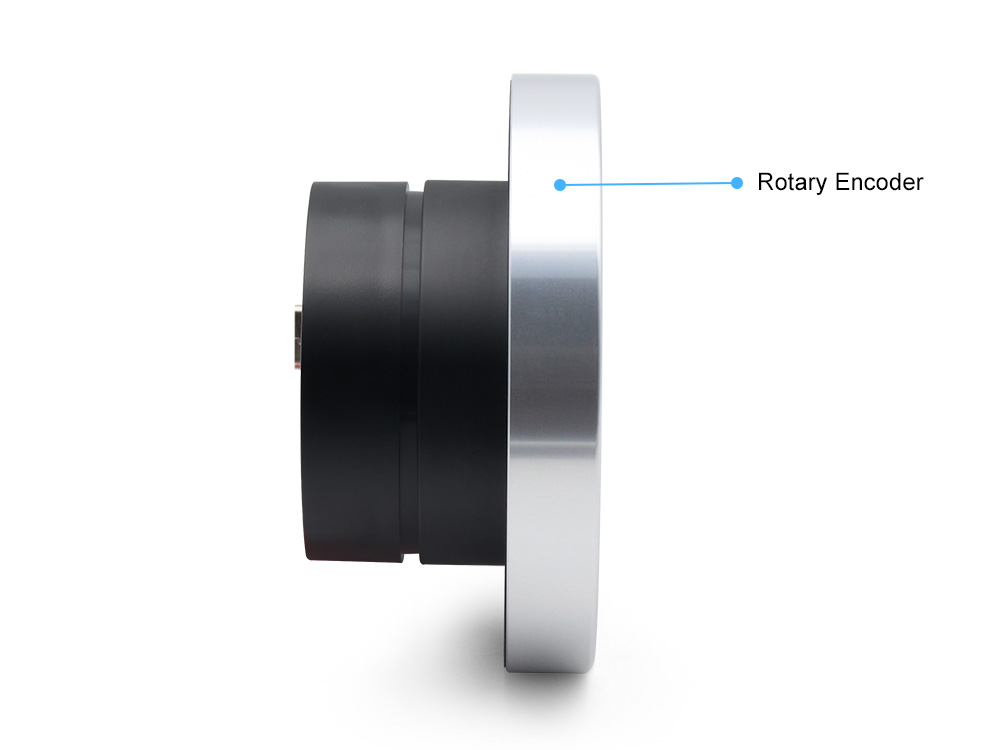
SELL POINT

Usage
NOTE: The same version of the library and package is recommended in case of upgrades make unexpected errors.
- Install the Arduino IDE V1.8.10/V1.8.19.
Install the ESP32 board package version 2.0.6
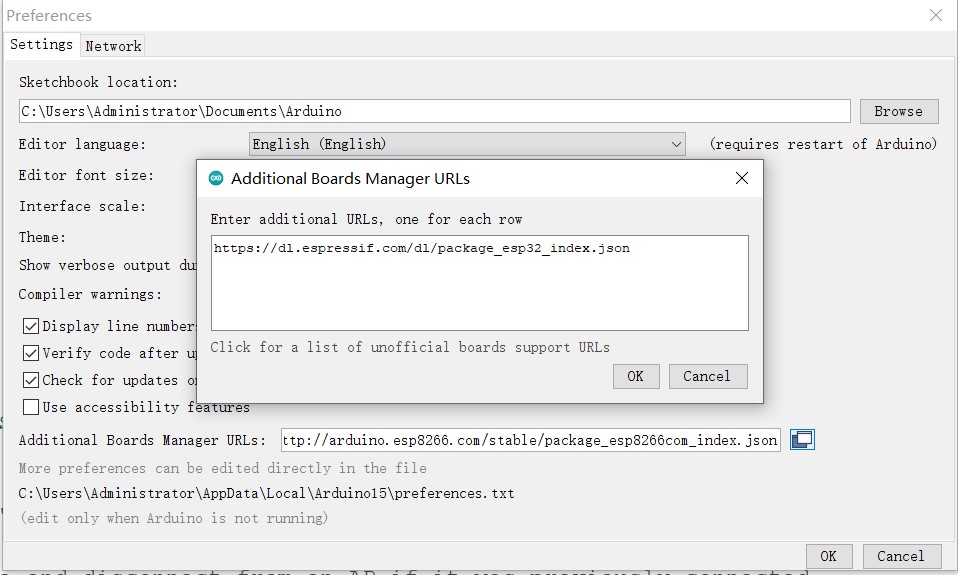
 You need to install the ESP32 package in Arduino IDE if there is no board package to support ESP32-S3.
Select “File>Preferences>settings>Additional Boards Manager URLs” to fill the link: https://dl.espressif.com/dl/package_esp32_index.json
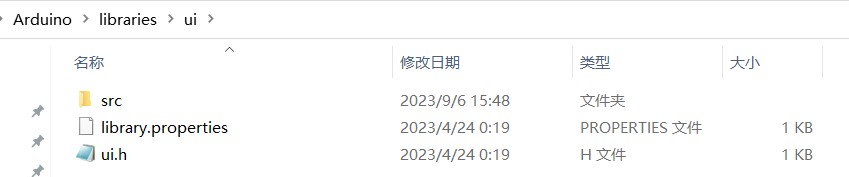
Copy the ui library folder to Arduino library directory, it often located in C:\Users\Administrator\Documents\Arduino\libraries:
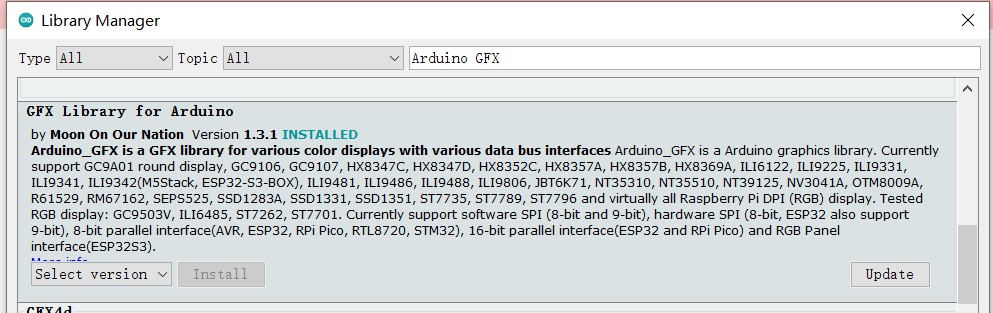
Install GFX Library for Arduino V1.3.1
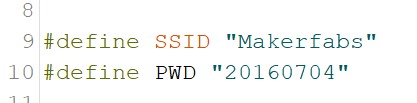
Open the code ui.ino, You need to modify the following lines with your local WiFi network: SSID and password.
Now, compile and upload the code to ESP32-S3.
1) Plug your Matouch 2.1” board in your computer;2) In the Arduino IDE select your board in Tools > Board (in our case we’re using the ESP32S3 Dev Module);
3) Select the COM port in Tools > Port. 4) Click the Upload button in the Arduino IDE and wait a few time while the code compiles and uploads to your board.
5) Press the reset button after the “Done uploading” message.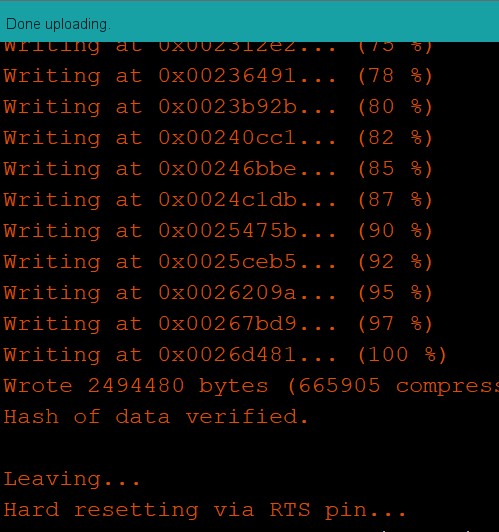
Results Show
Now you can test it if your board working properly. You can touch the capacitive panel to get the X/Y location, press the display to a new UI, rotate screen to increase or decrease the progress bar.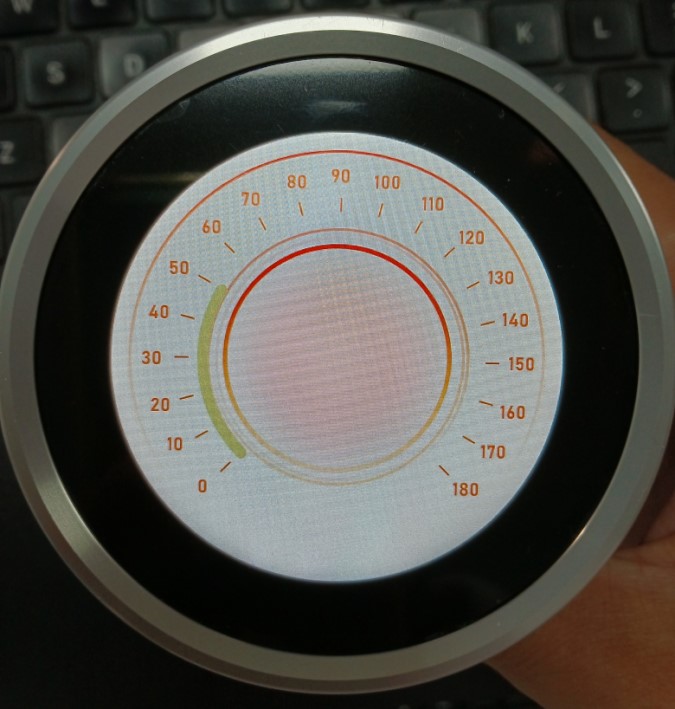
### Source
Commentaires
Enregistrer un commentaire